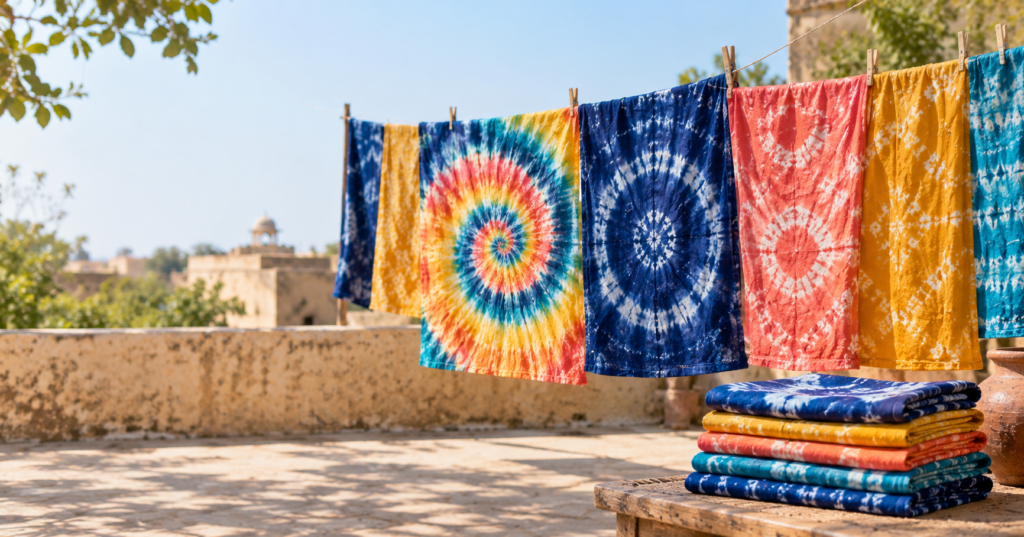
Tie dye techniques look complicated until you try one. Then you realise it is mostly folding, tying and a little patience. The folds you make decide where the dye goes, and the dye decides how soft or sharp the pattern turns out. The fabric does the rest.
This guide walks through ten tie dye techniques you can try at home, from the easy scrunch to shibori and Bandhani dots. You will also find the tie and dye materials you need, which fabric tie and dye works best on, and what to do if you want to dye silk or satin. At Anaprinta, our block printing studio in Bagru near Jaipur, we work with natural dyes and resist methods every day, so we have written this the way we would explain it to someone standing next to us at the dye table.

What is tie and dye?
Tie and dye is a resist dyeing method. You tie, fold, twist or stitch cloth so that dye cannot reach certain parts. When you open the cloth, the protected areas stay light and the exposed areas carry the colour.
You will see two names for it. In India and the UK people say “tie and dye”. In the US it is “tie-dye”. It is the same craft.
It is also very old. In Rajasthan and Gujarat, Bandhani is made by pinching tiny points of cloth and tying each one with thread, which gives the dotted patterns you see on dupattas and sarees. Leheriya, popular in Rajasthan, uses rolled and tied cloth to create diagonal wave stripes. In Japan the same idea is called shibori. Modern tie dye techniques are simply new, faster cousins of these traditions.
Tie and dye materials: what you need before you start
You do not need a studio. Most tie dye materials are cheap, easy to find, and often already at home.
- Fabric: washed and still slightly damp
- Dye: fibre-reactive dye for cotton, linen and rayon; acid dye for silk and wool (more on this below)
- Soda ash: only for cotton, linen, hemp and rayon. It helps the dye bond
- Rubber bands, strong thread or sinew: to hold the folds
- Squeeze bottles or plastic tubs: to apply the dye
- Gloves, an apron and a dust mask: powdered dye should not be breathed in
- Plastic sheet, a tray or a wire rack: to protect your table and let extra dye drain
- Zip bags or cling film: to keep the cloth damp while the dye sets
One tip from experience with dyeing in general: put down more plastic than you think you need. Dye travels.

Fabric tie and dye: which fabric works best?
Fabric matters more than most beginners expect. Dye bonds with fibres, so the fibre decides the colour you get.
Cotton, linen, hemp and rayon are the easiest. They take fibre-reactive dye well and give bright, lasting colour. If you are choosing fabric for tie and dye for the first time, a plain white or cream cotton is the safest start.
Blends are less predictable. The more polyester a fabric has, the paler and patchier the colour will be, because polyester does not accept the same dyes. Silk and wool are protein fibres and need a different dye. Here is a quick reference.
| Fabric | Dye to use | Activator | Notes |
|---|---|---|---|
| Cotton, linen, hemp, rayon | Fibre-reactive dye | Soda ash | Easiest, strongest colour |
| Silk (including silk satin) | Acid dye | Vinegar or citric acid | Do not use soda ash |
| Wool, nylon | Acid dye | Vinegar or citric acid | Handle gently when wet |
| Polyester, polyester satin | Disperse dye | High heat | Hard to do at home |
| Cotton-polyester blends | Fibre-reactive dye | Soda ash | Colour comes out pale |
Always check the care label first, then dye a small test piece before you commit the whole cloth.
Tie dye satin fabric
Satin is a weave, not a fibre, and that is where people get caught out. A satin can be made from silk, polyester, cotton (sold as sateen) or a blend. What you can do with it depends on what it is made of.
If your satin is silk, you can dye it with acid dye and vinegar, and the shine makes colours look deep and rich. If it is cotton sateen, treat it like any other cotton. If it is polyester satin, ordinary home dyes will barely stick, and you would need disperse dye and heat close to boiling. For a first try, we would not recommend that route.
Satin is also slippery. Folds slide open, so use strong thread or sturdy bands instead of thin elastic, and tie firmly without crushing the cloth. Simple tie dye techniques like the scrunch, pleated folds and ombre suit tie dye satin fabric best. Complicated folds tend to loosen mid-dye.
Tie and dye silk fabric
Silk is strong when dry and delicate when wet, so go gently. Wash it with a mild soap, keep the water lukewarm, and never wring it hard. Silk is a protein fibre, so skip the soda ash completely. Strong alkali can damage it. Use acid dye with vinegar or citric acid, and fix the colour the way your dye maker says, since many acid dyes need heat to set.
Scarves, dupattas and stoles are the usual choices for tie and dye silk fabric, and the soft, blended edges you get on silk are exactly why it is so popular. Dry it flat in the shade.

Get the fabric ready
Good prep is the quiet reason some tie dye looks bright and some looks tired.
- Wash first. New fabric carries starch and finishing chemicals that block dye. Wash it with a plain detergent and skip the fabric softener.
- Soak in soda ash (cotton, linen, hemp, rayon only). A common mix is about one cup of soda ash to one gallon of warm water. Soak for around 15 minutes.
- Wring out, but keep it damp. Damp cloth takes dye more evenly than dripping or bone-dry cloth.
10 tie dye techniques to try
The best folds only use a handful of moves: scrunching, twisting, pleating, rolling and binding. Start with the first few and work your way down.
1. Scrunch (crumple)
Pinch the fabric and push it into a loose, flat disc with random folds. Hold it with two or three bands. Apply colour on both sides and let the dye find its own way. This is the most forgiving of all the tie dye techniques, which is why it works so well for kids and first-timers.
Best for: beginners, soft watercolour looks, multi-colour palettes.
2. Spiral
Lay the fabric flat, pinch the centre and twist until the whole piece coils into a flat circle. Put 3 bands across it so it looks like a pie cut into six wedges. Colour each wedge differently. The result is the classic swirl.
Best for: t-shirts, rainbow colours, bold designs.
3. Bullseye
Pinch the fabric at the point you want as the centre and pull it upward. Place bands down the length at even spacing. Dye the sections between the bands in alternating colours to get rings.
Best for: one-off statement pieces, tote bags, two-colour looks.
4. Accordion fold (fan fold)
Fold the fabric back and forth like a paper fan to make a long strip, then fold the strip again if you want a smaller bundle. Band it in a few places. Dye in stripes across the bands for clean, repeating lines.
Best for: crisp stripes, symmetrical patterns, scarves.
5. Stripes and roll
Roll the cloth tightly from one edge into a long tube, then tie it at intervals. Rolling straight gives horizontal or vertical stripes. Rolling from a corner, diagonally, is how traditional Leheriya waves are made.
Best for: dupattas, scarves, flowing diagonal patterns.
6. Sunburst
Gather small handfuls of cloth in different spots and bind each one with a band. Each bound spot becomes its own starburst of colour. Tie tighter for a sharper white centre.
Best for: all-over prints, napkins, cushion covers.
7. Shibori (clamp and pole wrap)
Shibori is the Japanese cousin of tie dye. For a clamped design, fold the fabric into squares or triangles and press it between two blocks or pieces of wood so dye cannot enter where they touch. For a pole wrap, wind the cloth around a pipe and bind it. The patterns are crisper and more geometric than a typical tie dye. It is traditionally done in indigo.
Best for: geometric patterns, indigo, home textiles.
8. Bandhani dots
Take a tiny pinch of cloth, wrap thread tightly around it and move on to the next point. Repeat hundreds of times. After dyeing and untying, each tied point leaves a small ring of undyed cloth. It takes patience, but it is the technique behind many famous Rajasthani and Gujarati textiles.
Best for: patient makers, fine cotton, silk dupattas.
9. Ombre (dip dye)
Soak the bottom of the fabric in dye, then lower the cloth a little further at regular intervals so the colour fades upward. Keep the time between each dip even and you get a smooth gradient.
Best for: silk and satin, curtains, scarves.
10. Ice dye
Pile your folded cloth on a rack, cover it with ice and sprinkle powdered dye over the top. As the ice melts, the dye seeps down and splits into soft, mottled colours. It is the least messy way to apply dye because there is no mixing or splashing.
Best for: watercolour effects, moody palettes, cotton.

Which should you try first? If you are brand new, start with the scrunch or the fan fold. If you have done a couple, try the spiral and the bullseye. Once you are comfortable, move on to shibori and Bandhani dots.
How to tie dye: the basic steps
Every one of the folds above follows the same sequence once the folding is done.
- Fold and tie your damp, pre-washed fabric using your chosen technique. Tighter bands leave crisper white lines, while looser ones give softer blends.
- Mix your dye following the packet instructions.
- Apply the dye to each section. Press the dye deep into the folds, then flip the bundle and do the other side. Missed folds are the number one cause of big white patches.
- Let it set. Wrap the bundle in plastic or a zip bag so it stays damp. Dye needs time to bond, so follow your dye maker’s guidance. Many people leave fibre-reactive dye for several hours, or overnight to be safe.
- Rinse under cold running water, with the bands still on, until the water runs mostly clear. Then remove the bands and keep rinsing.
- Wash and dry. Wash on its own in warm water with a gentle detergent. Dry flat or on a line, out of harsh sun.
Colour tips that save you from muddy results
- Colours that sit opposite each other on the colour wheel, like red and green or blue and orange, turn brown where they touch. Keep them apart with a thin white gap, or choose neighbouring colours instead.
- When you dye in layers, go lightest to darkest.
- Mix a little more dye than you think you need. Running out halfway is worse than wasting a spoonful.
- Test on an old piece of the same fabric first, especially if you are about to dye something precious.
Looking after tie dyed fabric
Wash it separately for the first few washes, in cold or lukewarm water, because some loose dye can still come out. Use a gentle detergent and dry it away from direct midday sun. Silk and satin are happier hand washed.
Want to learn dyeing hands-on in Bagru?
Reading about tie dye techniques is one thing. Seeing resist dyeing happen in front of you is another. Our block printing and dyeing workshops in Bagru are run by the artisans who do this work every day. The four-day workshop covers four methods including Jahota/Shibori, and our six-day workshop includes tie-dye along with dabu, discharge and eco printing, so you can see how different resist methods behave on the same cloth.
If you are curious about the deeper end of dyeing, read our guide to natural indigo dyeing in Bagru. Indigo is the dye most closely tied to shibori and resist work in Rajasthan.

Shop handmade textiles from Bagru
If you would rather buy than dye, we also make textiles the traditional way. Browse our hand block printed cotton fabric on the website. If you are outside India, you can shop hand block printed pieces like tote bags, bandanas and dinner napkins on Anaprinta Textiles on Etsy, and we ship abroad. You can also follow our dye pots and printing days on Instagram @anaprinta. Want to know who we are? Our about page has the story.
Frequently asked questions about tie dye techniques
What is the easiest tie dye technique for beginners?
The scrunch. You push the fabric into random folds, hold it with a few bands and add dye. It is very hard to get wrong, and the fan fold is the next easiest.
Which tie and dye fabric is best?
Natural fibres such as cotton, linen, hemp and rayon give the brightest, longest-lasting colour. A plain white or cream cotton is the best place to start.
Can you tie dye satin fabric?
Yes, if it is made from silk or cotton. Silk satin takes acid dye, and cotton sateen takes regular cotton dye. Polyester satin is very hard to dye at home because it needs disperse dye and high heat.
Can you tie dye silk without soda ash?
You should. Soda ash is for cotton and other plant fibres, and it can harm silk. Use acid dye with vinegar or citric acid instead.
How long should tie dye sit before rinsing?
Follow the instructions on your dye. Fibre-reactive dye usually needs several hours to bond, and many dyers leave it for 24 hours to be safe.
Is tie dye the same as tie and dye?
Yes. “Tie and dye” is the more common phrase in India and the UK, and “tie-dye” is more common in the US. Both mean tying cloth so dye cannot reach certain areas.
Final thoughts
The best way to learn tie dye techniques is to dye something small and cheap first, like a cotton napkin or an old pillowcase. Pick one fold, mix two colours and see what you get. The mistakes teach you faster than any guide will. When you are ready to go deeper, our studio in Bagru is always happy to show you how it is done.