Indigo Dye: How It’s Made, Grown and Used in Bagru
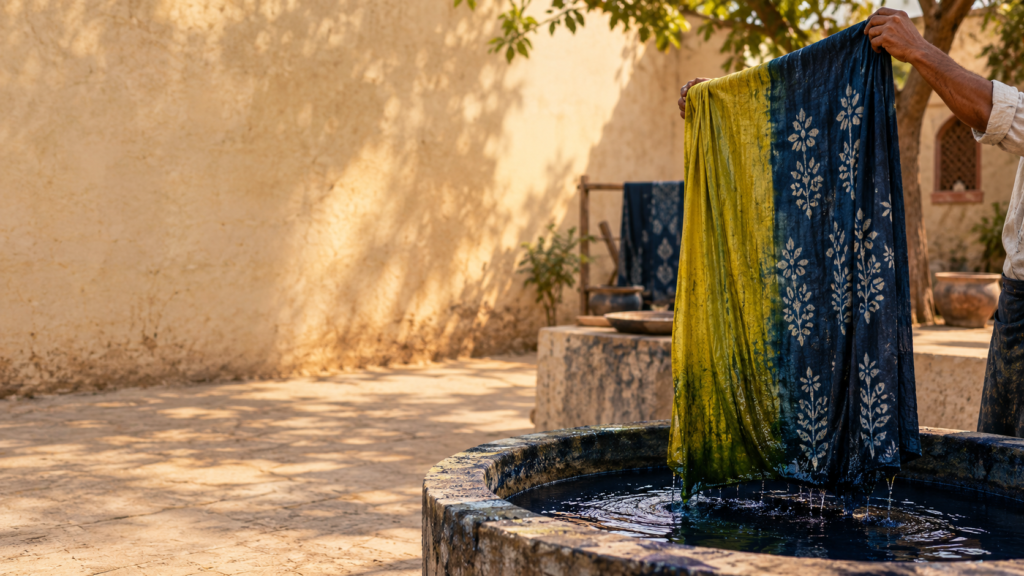
Lift a piece of cotton out of an indigo vat and it isn’t blue. It’s green, a murky yellow-green that looks completely wrong. Then the air reaches it, and within a minute or two the cloth turns blue right in your hands. That one moment is why indigo dye has held people’s attention for thousands of years. It’s also the first thing we show visitors at Anaprinta, a family-run block printing studio in Bagru, near Jaipur. The studio is led by Anup Chhipa, a fifth-generation block printer, and indigo is one of the natural dyes we work with, along with madder and turmeric. This guide covers what indigo dye really is, how natural indigo dye is made from a leaf, why a dark indigo color takes patience, how to make indigo colour at home, and what growing indigo needs in the US, UK and India. And if you’d rather see it than read about it, our block printing workshops in Bagru include indigo dyeing. What Is Indigo Dye? Indigo dye is a deep blue dye that traditionally comes from the leaves of Indigofera plants, mainly Indigofera tinctoria. It is a vat dye: it has to be made soluble in an oxygen-free bath first, and it only turns blue when the fabric meets air. Three things are worth knowing before we go further. First, no plant actually contains blue. The leaves hold a colourless compound called indican, and the blue shows up only after fermentation and oxygen do their work. A Rutgers University dye research blog points out that over two hundred plants, from different families, make the same indigo precursor. Different plants, same blue. Second, most indigo dye made today is synthetic. Wikipedia puts it at around 80,000 tonnes a year as of 2023, mostly for denim, where one pair of jeans takes just 3 to 12 grams of dye. Third, the name is a clue to where it came from. Indigo comes from the Greek indikon, meaning “Indian”, which the Romans turned into indicum. A Short History of Indigo Dye (and Why India Is Part of It) India sits right at the centre of this story. Fibre2Fashion’s overview of indigo says Indigofera tinctoria was first domesticated in India, and mentions manuscripts from around the 4th century BC that refer to it. For centuries, Europe leaned on woad, a blue dye from a different plant, while indigo arrived from India as an expensive import. In the 1500s, France and Germany even banned imported indigo to protect their own woad growers. Then chemistry stepped in. A laboratory route to indigo was worked out in 1882, and by about 1900 natural indigo was no longer the only source. For a lot of indigo farmers, growing it stopped paying. Today there’s a small comeback. Craft studios, denim makers and a few farmers are returning to natural indigo dye, partly for sustainability and partly because people want a slower, more traditional dye. How Natural Indigo Dye Is Made From a Leaf Natural indigo dye is made in four stages. This is the traditional version, as Heddels describes it: Japan has its own version. Persicaria leaves are composted for three to four months into a material called sukumo, which is the base of Japanese indigo dyeing. The numbers explain why natural indigo dye costs more. Heddels notes that you need roughly 10 to 20 kg of leaves to get 1 kg of usable pigment. That’s a lot of plants for a small jar of powder. How Indigo Dye Works on Fabric Indigo doesn’t dissolve in water. To dye with it, you “reduce” the powder into a soluble form called leuco-indigo, which is yellow-green. Cloth goes into this vat and soaks up the leuco-indigo. Once it’s out in the air, oxygen turns it back into insoluble blue indigo, now trapped in the fibres. The Rutgers blog adds a detail most people miss: indigo mostly sits in the fibres mechanically rather than bonding with them. That’s why indigo dye rubs and fades, and why denim fades so beautifully. What this means in practice: Indigo Dye in Bagru: Where Mud Meets Blue Bagru printing and indigo belong together. The Chhipa community has block printed here for generations, and Global INCH records the traditional palette as deep red, indigo-blue, green, iron-black and marigold yellow. The technique most tied to indigo is Dabu, a mud-resist method. Mud paste is block-printed onto the cloth, the cloth is dipped in the indigo vat, and the mud stops the dye from reaching the pattern. Once the cloth is sun-dried and the mud washed out, the motifs stay pale against the blue. Wikipedia’s page on Dabu mentions a local story that the method was found by accident, when mud-stained fabric resisted indigo. Our two-day workshop teaches Dabu resist along with indigo and kashish (ferrous sulphate) dyeing. If you want more background first, read what hand block printing is or our guide to natural dyeing workshops in Rajasthan. Indigo also works beautifully with resist folding, which we cover in our tie dye techniques guide. How to Make Indigo Colour: Paint Mix or Dye Vat? When people ask how to make indigo colour, they usually mean one of three things. If you mean paint or pigment: indigo is blue with a little red. Nerolac’s mixing guide suggests about 80 parts blue to 20 parts red for a classic indigo, a trace of black to go darker, and a dried test patch before you commit. Ultramarine makes a good base. Add the red slowly, because too much tips it into violet. If you mean dye: you need indigo powder, an alkali such as lime, and a reducing agent such as fructose. Botanical Colors teaches this as the 1-2-3 vat, with step-by-step guides. When the vat is ready, the liquid turns clear yellow-green and a coppery film forms on top. If you grow your own leaves: the simplest route is fresh-leaf dyeing. The Simple Things shares a silk scarf project from Indigo Garden London: rinse the tops